 |
Plaster Disaster...
by Rivian Warder
(Tri-Cities, WA.)
Site tip> I can't find anything with a date stamp on it so I'm not sure if I am posting on a site that hasn't been touched in the last 3 years or not. [Thanks for the tip! Others may be having trouble with this also, so I decided to add the dates for each Blog entry when it's created. - GJW]
2-16-10
Ok I'm a little bit frustrated by trying to put plaster on my layout... Ok a bit of my back story...
About 6 yrs ago I had a layout made of track, tacked down to fuzz board around my home office room. When I changed to a new job out of the house I took down my layout and made the room into a guest room.
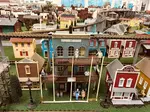
In January I was laid off and I decided to take my extra spare time and start making a "REAL" Layout. (I was a bit jealous of what I saw on the internet) I took over the back portion of the kids playroom and started to build. I am trying to do this layout as inexpensively as possible. I have pics of my progress on my FaceBook page, but I am now trying to cover the paper with plaster; and it is being a huge pain in the backside. I've watched the "DYI" specials and surfed the net. I found out how to use "Plaster paper" but it will cost too much. So I decided to use paper towels dipped in a solution of water and Plaster of Paris. but holy cow this is tedious! I have to move very quickly to cover what I can before the plaster is too thick. I have put on 2 layers, and yet all I see is all the edges of the paper towels. Last night I made up a mix of plaster and used a paint brush to "Paint" it on. now that is looking good! but really?!? 2 days... 2 layers of paper towel plaster stuff...and i still have to brush on a final coat? I now have 3 days invested
is it really this difficult? or am I missing something?
Any suggestions would be great.
Rivian Warder
[Actually, what you're showing in the picture looks pretty good.
It may be that the plaster mix you used was not soupy enough. You probably need to thin it out more with water the next time. The consistency should be somewhere between water and cream soup. After you have applied the paper towels soaked with the thin plaster mix, you can then use the brush to paint more plaster mix over the paper towels to be sure the edges are plastered down if you need to.
Remember that this doesn't have to look perfect at this stage, because you will be covering over the plaster with paint and ground foam, rocks, trees, etc. Even if the newspaper wads underneath show through the plaster at this stage, that's okay. You just want to have a shell that's sturdy enough to hold the scenery. Sometimes, it will take 2 layers depending on your plaster mix.
It shouldn't really take that long, although when you first start the process, it may take a little time to get your routine going. Once you get the hang of it, it should go fairly rapidly. It may help to have all your supplies set up on a table at the edge of the layout - pan of water, plaster, brush and paper towels all ready to go.
Have all the newspaper wads in place before you start plastering over them so you don't have to mess with them while you're applying the paper towels.
There is another method to consider. That is to use liquid glue instead of plaster to brush over dry paper towels that have been taped to the surface of the newspaper wads. I haven't used this method, and I suspect it might take longer, but you wouldn't have the trouble of the plaster drying out too quickly.
I hope that helps. Let us know how it goes.
-GJW]
Comments for Plaster Disaster...
|
||
|
||
|
||
Back to Home Page
Contact Me | Blog | Photos | References | Supplies | GiftShop | Sitemap | Search | Comment | Privacy Statement | Disclosures
Tracks Newsletter: Sign Up Here!
√ = ad or sponsored link
What's New on BYMRR.com?
Recent Articles
-
Model Railroad Supplies
Dec 16, 25 03:46 PM
We have started a new store to help you build your layout and teach your youngsters about science with STEM products. -
DC and/or DCC on the Same Layout
Mar 09, 25 10:46 AM
How to wire your layout for either DC and/or DCC operation. -
Looking for a locomotive speaker
Nov 24, 24 07:29 AM
First Name: Randy E-Mail Address: bymrr@building-your-model-railroad.com Enter your question: : I am looking for a speaker for a Walthers EMD SD70ACE Locomotive, product number 910-9866. The control b…


