 |
Special Lighting Effects for Your Model Railroad

Special lighting effects are an excellent way to spruce up your train layout. Viewing night scenes on a model railroad is awe inspiring. Picture your lighted steam engine weaving in and out of towns with street lights, lighted neon signs and marquees, lighted billboards at the edge of town. In the background, there is a glow of the sunset behind the mountains. Add some sound effects of the chuff of the engine, the clickety-clack of rail cars along with ambient city sounds, and you have the makings of an awesome model railroading experience.
You’re thinking, How can I do all that??
Lighting effects are not that difficult. In fact, with the electronics available now, it's easy. Read on…
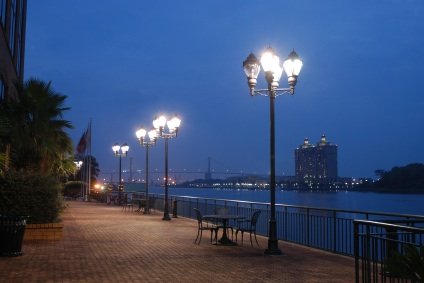
Street lamps
If you have a small town or city on your layout, or even just a group of shops or houses, the addition of streetlights to the scene is an easy way to use lighting effects to enhance the realism and character of the town.
There are many different types of street lamps available in multiple scales from various manufacturers, including Model Power, Life-Like, Miniatronics, Brawa, Vollmer, etc. You can find old-style gas lamps all the way up to modern streetlights. There are not only the tall standing street lamps, but also many types of operating wall mounted lamps available. Just browse the Walthers catalog to find many of these lighting effects or visit the Miniatronics website (www.miniatronics.com).
To install the streetlamps, drill a hole smaller than the base of the lamp and thread the wires to the bottom of the layout. Then use silicone glue to seal the base of the lamp to the layout surface. They should be placed out evenly along the street, 2 per city block on average.
Wiring can be done in series or parallel from an AC power source. If you wire them in series (connected end-to-end), the lamps have to divide the voltage, so that the bulb of each will be dimmer than it would be otherwise. Also, if one lamp is burned out, they will all go off. If you wire in parallel (using 2 bus wires with feeder wires going to each lamp, or if you use a power distribution block), all the lamps will have full brightness and if one goes out the others stay on. Thus, parallel wiring is really the preferred method. It’s much easier to troubleshoot when a light burns out.
You can use a combination of parallel and series wiring for your lighting effects, if you wish, by placing groups of similar lights on the same street in series controlled by one switch; then, this group could be placed in parallel with other groups of lights, each group controlled by it’s own switch. This would provide better organization and control if you have a lot of lights in your city.
Make sure your lamps can handle the voltage from the power source; otherwise they will burn out quickly unless you put a resistor in the circuit. This is especially true for LEDs. To find out how much resistance you need to add, subtract the supplied voltage (by the power source) minus the voltage rating of the lamp and then divide by the current (ampere) rating of the lamp:
Resistance needed (ohms) = (supplied voltage – voltage rating of the lamp) divided by current (ampere) rating of lamp (in amps, not milliamps).
You can add a rheostat from Radio Shack, if you wish, which works like a dimmer switch by increasing or decreasing resistance in the circuit to control the brightness of the lights. The wattage of the rheostat required = the lamp current (in amps) X the supplied voltage. The resistance (ohms) rating for the rheostat can be estimated by dividing the voltage rating of the lamp to be controlled by the current rating for the lamp in amps, then multiply by 5.
Yard lights
You can buy these special lighting effects from Miniatronics in HO or N scale, or for modern era layouts, you can use expressway lights (use the tallest versions available) made by Miniatronics, Brawa or Life-Like. Use a 9-volt battery at first to test-position them in the yard to determine where they enhance the scene most effectively. Then drill the hole(s) to the bottom of the layout. Thread the wires to the bottom. Then extend the wires to either an on-off switch or to a rheostat, which is then connected to your power unit. You could also wire them in parallel with other similar lights using a power distribution block and have them all controlled by one switch or rheostat on the control panel.
Spotlights
Small, adjustable spotlights are available from Miniatronics, Life-Like and Circuitron, which can be used to highlight buildings, industries, or other scenes. They contain 12-15volt incandescent bulbs, using either AC or DC current.
Billboards
Lighted billboards are another great way to add lighting effects for realism and excitement to your night scenes. You can purchase these already made up and ready to install on your layout from Model Power (www.modelpower.com).
There are multiple other styles of billboards available from other manufacturers like Athearn, Scale Structures, JL Innovative, Blair Line and Bar Mills, which are not lighted; but it’s not difficult to add your own light…
The Outdoor Billboard Light Kit made by Miniatronics (www.miniatronics.com), makes it easy to add billboard lighting effects. It contains 2 brass, angled tubes with attached reflectors containing 1.5v, 30mA bulbs. You will have to drill 2 small holes in either the top or the bottom of the billboard, whichever you prefer. Then thread the wires through the hole and insert the brass tube in the hole with glue to mount it, one light on each side. You can then connect the wires to either a 1.5v AC or DC power source like a battery or to an AC transformer with a resistor or rheostat in line to lengthen the life of the bulb.
Ngineering (www.ngineering.com) is another electronics company that makes very tiny LED lights that can be used for HO or N scale billboard lighting effects or as building lamps. Wiring and soldering instructions are noted on the website.
Emergency vehicles and lighthouse beacons

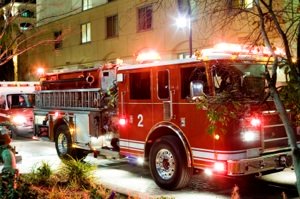
A great way to add realism to a fire scene or accident scene on your layout is to add police, rescue and fire emergency vehicles with flashing beacons that grab your attention. This does require some disassembly of the vehicle and reassembly, but the final lighting effect is exciting.
GRS Micro Liting (grsmicroliting.com) makes several of these beacons for N through G scales. They also make one for lighthouses.
If you want a litebar for your police or ambulance vehicle, you can purchase these from either GRS or Miniatronics.
GRS also makes a complete vehicle lighting kit with headlights, tail-lights, and flashing headlights for emergency vehicles.
Theater Kits
Although it sounds daunting to install lighting effects for a movie theater marquee, it’s actually very easy using the kits that are available.
Check out the Chase Light Movie Marquee by Miniatronics containing 24 yellow LEDs that follow a pattern around the sign; the lights also stop, restart, and flash off and on, etc. to create a very realistic effect for your downtown nightlife area. A 9-14v AC or DC power source is required. It comes as a PC board that you can place on the front of a building and includes movie titles and a mounting kit.
M-TEC theater kits (if you can find them) include the theater, which you will have to put together, the circuit board, LEDs and all the parts you need to create a rather impressive lighting effect for your theater scene.
Circuitron uses a sequence of strobe lights to create chase lights around a sign for another type of marquee style lighting effect. You will have to make or have your own sign and install the lights by drilling small holes around the border. You can use a theater sign from a kit to do this if you wish, or make the whole sign from scratch depending on your preference and what you want to emulate. You can cut out movie ads from an old magazine or brochure, make a styrene or wood border for it and install your chase lights in the border. Requires 10-18v AC or DC.
Fiber-optics by Light Works USA and Train Tronics can also be used to create a neat light pattern around your sign.
Neon Signs
Miniatronics produces neon-like signs which you can mount in your windows or on the front of the structure. You can also add a flasher unit to make the sign flash off and on. You can even create a flickering neon sign as if it’s about to burn out by connecting a small AM radio as your power source, using a mini headphone connector plugged into the headphone jack and the 2 wires from the sign connected to the prongs of the mini headphone connector.
Electroluminescence
Electroluminescent lighting is a very interesting method of creating lighted signs for your buildings. EL lights come in many different colors of sheets, cords and strips that emit light when attached to a power source and never burn out. You can cut them in any shape or size that you want. You can also get EL cables, which could be used as a lighted glow behind mountain scenery to produce a sunset effect against your backdrop.
You can adjust the intensity of the lighting effect by changing the current. A low voltage DC inverter has to be used to connect to the power unit or batteries (2 AAA batteries). Most of the time the DC inverter is included in the kit.
There are several manufacturers that make electroluminescent products…
• Miller Engineering’s Light Works USA (www.microstru.com)– The Experimenter’s Kit would be a great way to get started, which includes everything but the batteries. They also make various types of ready-made EL signs and even animated neon-like signs that flash or use chase patterns either vertically or horizontally). In addition, they make animated billboards using 3 or more layers of EL images that flash in sequence and which are very realistic and ready to install. All you have to do is buy the AAA batteries and hook up the wires. The DC inverter is included.
• That’s Cool Wire (www.thatscoolwire.com) would be good for the sunset glow behind your mountains or buildings.
• Being Seen (www.beingseen.com) - also great for those who are new to this product. The website contains lots of instructions on how to use EL creatively.
• ELWireOnline.com (www.elwireonline.com) is also a great resource for EL lighting.
Fiber optics
Fiber optic strands can be used to create lighting effects in very small places where you wouldn’t be able to get an incandescent bulb or even an LED (e.g., light signals, headlights, small spotlights). You can use it also to create many different lights from only one light source (e.g., Stars in the sky or city lights in the backdrop). Check out the website at www.thefiberopticstore.com.
Some tips to remember when working with fiber optics…
• When you cut a filament, use flush cutters so that the end will be perfectly flat. If it isn’t flat, you will have to use a fine emery board to sand it flat.
• You can slowly bend a strand 90 degrees, if you’re careful, with needle nose pliers, although you will lose a little of the light intensity by bending it. This can take some practice.
• Don’t use CA clue. It will damage the material. Use epoxy or silicone glue.
• You can flare the end of a strand using a soldering iron to make the end into a teardrop that can then be flattened on a cool surface. This will allow the light that comes out of it to be more diffused and less pinpoint in character.
To light your fiber optic strand(s), use a high intensity LED connected to a 100 or 200 ohm resistor for a 6v power supply, up to 400ohms for a 12v supply (The LED will last longer with a higher resistor in the circuit) and then connected to your power source.
Remember that LEDs are unidirectional and have to be lined up with the anode (long wire) on the positive end of the circuit and the cathode (short wire) on the negative side. The resistor should be attached to the anode.
Place a short plastic tube ¾ - 1 inch over the LED and tape it in place with vinyl electrical tape leaving a ¼ to ½ inch space or reservoir between the LED and the end of the tube so there will be room to slide the fiber optic bundle into the tube to butt up against the LED.
Bundle your fiber optic strands together if you’re using more than one, and slide a piece of heat shrink tubing over one end of the bundle. Make sure the bundle is flat on the end with no strands out of alignment. Place the end of the heat shrink tubing about ¼ inch from the end of the bundle, and then heat shrink the tubing, which will create a tight bundle on that end. Then slide the tight end of the bundle into the plastic tube where the LED is housed. Place another piece of heat shrink tubing over the assembly. Make sure the strands are straight and butting up directly against the LED. Then heat shrink the tubing to finish the assembly.
Now you can turn on the power to watch your strands light up!

Reference: Newitt, Paul, A Beginner's Guide to Creative Effects for your Model Railroad
Just Plug Lighting System - A newer easy method of installing lights almost anywhere on your layout.
***Click here for more info and for ordering items on this page.
See also ...
Lighting for model railroad structures, locos, cars and cabooses
From "Lighting Effects" to "Homepage"
This page was last updated on August 25, 2019.

Contact Me | Blog | Photos | References | Supplies | GiftShop | Sitemap | Search | Comment | Privacy Statement | Disclosures
Tracks Newsletter: Sign Up Here!
√ = ad or sponsored link
What's New on BYMRR.com?
Recent Articles
-
Model Railroad Supplies
Dec 16, 25 03:46 PM
We have started a new store to help you build your layout and teach your youngsters about science with STEM products. -
DC and/or DCC on the Same Layout
Mar 09, 25 10:46 AM
How to wire your layout for either DC and/or DCC operation. -
Looking for a locomotive speaker
Nov 24, 24 07:29 AM
First Name: Randy E-Mail Address: bymrr@building-your-model-railroad.com Enter your question: : I am looking for a speaker for a Walthers EMD SD70ACE Locomotive, product number 910-9866. The control b…


